Techhead7890 (talk | contribs) (navbox) |
(Add Upgrades section) |
||
| Line 23: | Line 23: | ||
(Q) Is it possible/effective to test 2 different cures at the same time, when both cures comes from processing lines with processing time of 2 (or more)? <br /> |
(Q) Is it possible/effective to test 2 different cures at the same time, when both cures comes from processing lines with processing time of 2 (or more)? <br /> |
||
(A) It is possible to test for multiple cures, I have done it with cures, 1 level 2 and 2 level 3, with multiple machines having processing times of 2, however it is not efficient to do so. |
(A) It is possible to test for multiple cures, I have done it with cures, 1 level 2 and 2 level 3, with multiple machines having processing times of 2, however it is not efficient to do so. |
||
| + | |||
| + | == Upgrades == |
||
| + | |||
| + | {| class="wikitable" |
||
| + | |- |
||
| + | ! Level !! [[Research Points]] !! Analyzer success rate |
||
| + | |- |
||
| + | | 0 || || 50% |
||
| + | |- |
||
| + | | 1 || 1 || 60% |
||
| + | |- |
||
| + | | 2 || 2 || 75% |
||
| + | |- |
||
| + | | 3 || 4 || 100% |
||
| + | |} |
||
| + | |||
[[Category: Machines]] |
[[Category: Machines]] |
||
Revision as of 04:28, 11 April 2016
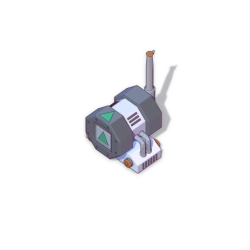
The Analyser is one of the Auxiliary Machines in Big Pharma.
Description
Identifies the Max Strength concentration of a drug's effects. Drugs are destroyed during the analysis process.
The machine's interface features a testing meter (%). This appears to indicate how efficiently the machine is being utilised, an Analyser which receives an ingredient once per day will have an efficiency of 100%, where as an Analyser which receives an ingredient every other day will have an efficiency of 50%. The amount of time it takes to find the Max Strength is directly proportional to the efficiency of the Analyser. For example if it would normally take 30 days to find the Max Strength at 100% efficiency, it should take approximately 45 days at 50%. In all cases the Max Strength will eventually be found.
Tips & Tricks
- If you want to test a specific trait of an expensive cure that have gone through many machines to unlock the trait, you should first fully test the basic components that make up that cure, by simply attach the tester to an import-port and import the basic cures directly into the tester, when all basic traits are done then you can attach the tester to the expensive cure, this makes it so it only test the newly unlocked traits and doesn't waste money on the easier traits.
- To effectively test cures from slower machines (processing time of 2 or more), make a long belt and fill up the belt with cures before you attach the Auto Tester to the end. I think the tester needs to heat up before it can produce a cure and if it doesn't get a test-subject each turn it will cool down to fast[citation needed].
Questions to be answered
(Q) Is it more effective to activate the trait you are testing for? Or is that just a waste of money?
(A) Testing on a line with level 2 cure, I saw no difference between activated and inactive effects, cures and side-effects.
(Q) Is it possible/effective to test 2 different cures at the same time, when both cures comes from processing lines with processing time of 2 (or more)?
(A) It is possible to test for multiple cures, I have done it with cures, 1 level 2 and 2 level 3, with multiple machines having processing times of 2, however it is not efficient to do so.
Upgrades
| Level | Research Points | Analyzer success rate |
|---|---|---|
| 0 | 50% | |
| 1 | 1 | 60% |
| 2 | 2 | 75% |
| 3 | 4 | 100% |
| Machines | |
| Belts | Belt |
|---|---|
| Basic | Evaporator • Dissolver • Agglomerator • Ioniser • Autoclave • Cryogenic Condenser |
| Advanced | Chromatograph • Ultraviolet Curer • Sequencer • Hadron Collider |
| Auxiliary | Analyser • Multimixer • Shaker • Centrifuge • Packer • Booster Mixer • Stock Gate |
| Makers | Pill Printer • Creamer • Sachet Fabricator • Syringe Injector |

